Heading
Cleanup And Restoration After A Basement Flood
Learn the complete flooded basement cleanup and restoration process, from water removal and structural drying to flood cuts, drywall repair, and repainting.
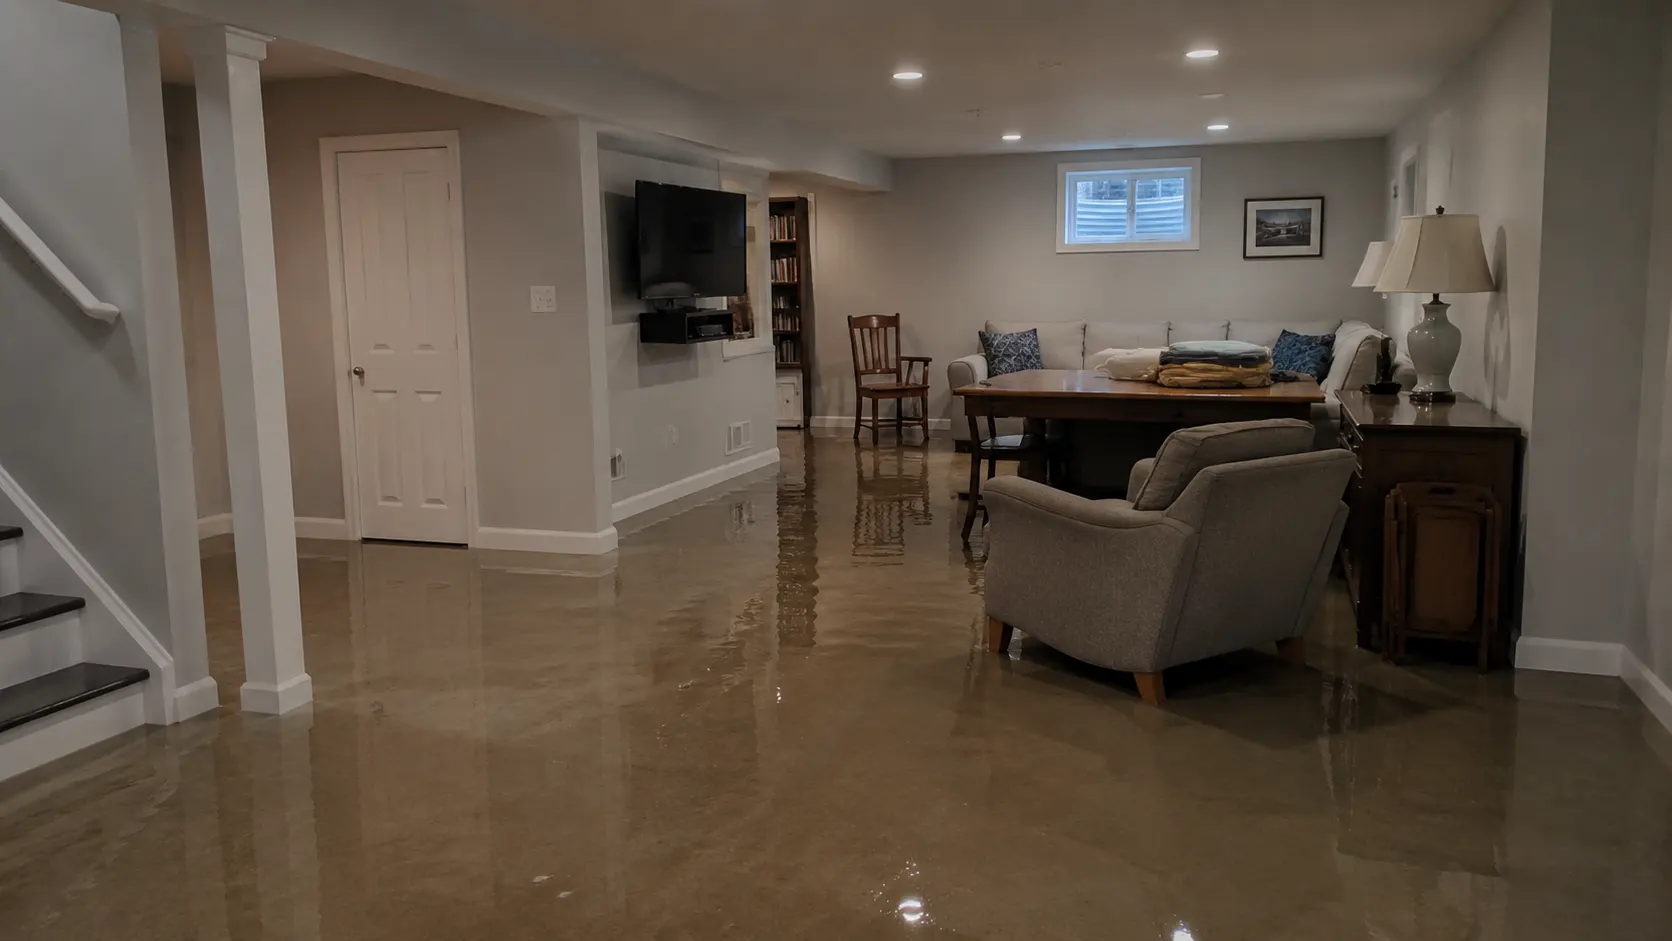
A flooded basement can damage much more than the flooring you can see. Water can soak into drywall, insulation, wood framing, baseboards, and other materials hidden inside the walls. Even after the standing water is pumped out, moisture can remain trapped inside a finished basement.
That is why proper drywall restoration after basement flooding involves more than cutting out a few damaged sections and installing new drywall. The basement needs to be drained, opened up, cleaned, dried, inspected, and tested before reconstruction begins.
For homeowners in Springfield and Western Massachusetts, MrWalls Drywall & Painting provides basement drywall restoration services that take damaged walls from flood cleanup through finished drywall and repainting.
This guide explains the process we follow after a basement flood, including water removal, the drywall flood cut, wet insulation removal, structural drying, drywall replacement, taping, finishing, and painting.
Standard drywall is made with a gypsum core covered by paper. Both the paper facing and gypsum can absorb moisture.
When floodwater reaches the bottom of a finished basement wall, moisture may travel beyond the visible waterline. Water can also become trapped inside the air pockets of fiberglass insulation. These same pockets that are intended to slow the transfer of energy act as tiny cups that hold onto water like a sponge.
Wet Drywall May:
Fiberglass insulation also hold water against wooden wall framing and if not removed gives mold the moisture it needs to grow on the back of the drywall and on wood framing.
This hidden moisture is one of the main reasons opening the wall is such an important part of basement flood restoration.
The EPA recommends drying flooded materials as quickly as possible, ideally within 24 to 48 hours. Materials that cannot be properly cleaned and dried may need to be removed.
Before restoration work starts, the basement needs to be safe to enter.
Floodwater can create electrical, structural, biological, and slip hazards. Water entering through a sewer backup or outdoor flooding may also contain bacteria, chemicals, sewage, or other contaminants.
A restoration professional may first check:
Homeowners should avoid entering standing water when electrical equipment or wiring may still be energized.
When appropriate, the damage should also be photographed before demolition begins, particularly when an insurance claim may be involved.
The first major restoration step is removing standing water.
Depending on the amount of water present, a restoration crew may use:
The goal is to remove bulk water so damaged materials can be accessed.
The water is pumped in hoses away from the house a distance and safely discharged.
Once standing water has been removed, the crew can begin evaluating the walls, flooring, insulation, and framing. The water often gets wicked higher in the drywall than the level of the flood, so special moisture meters are used to assess how high to remove the drywall.
Furniture, cardboard, carpet, padding, stored belongings, and other wet materials can interfere with drying.
Items that cannot be cleaned or dried need to be removed from the basement.
The restoration crew may also remove:
Removing these materials exposes hidden wet areas and allows air to circulate.
This is where the drywall flood cut usually begins
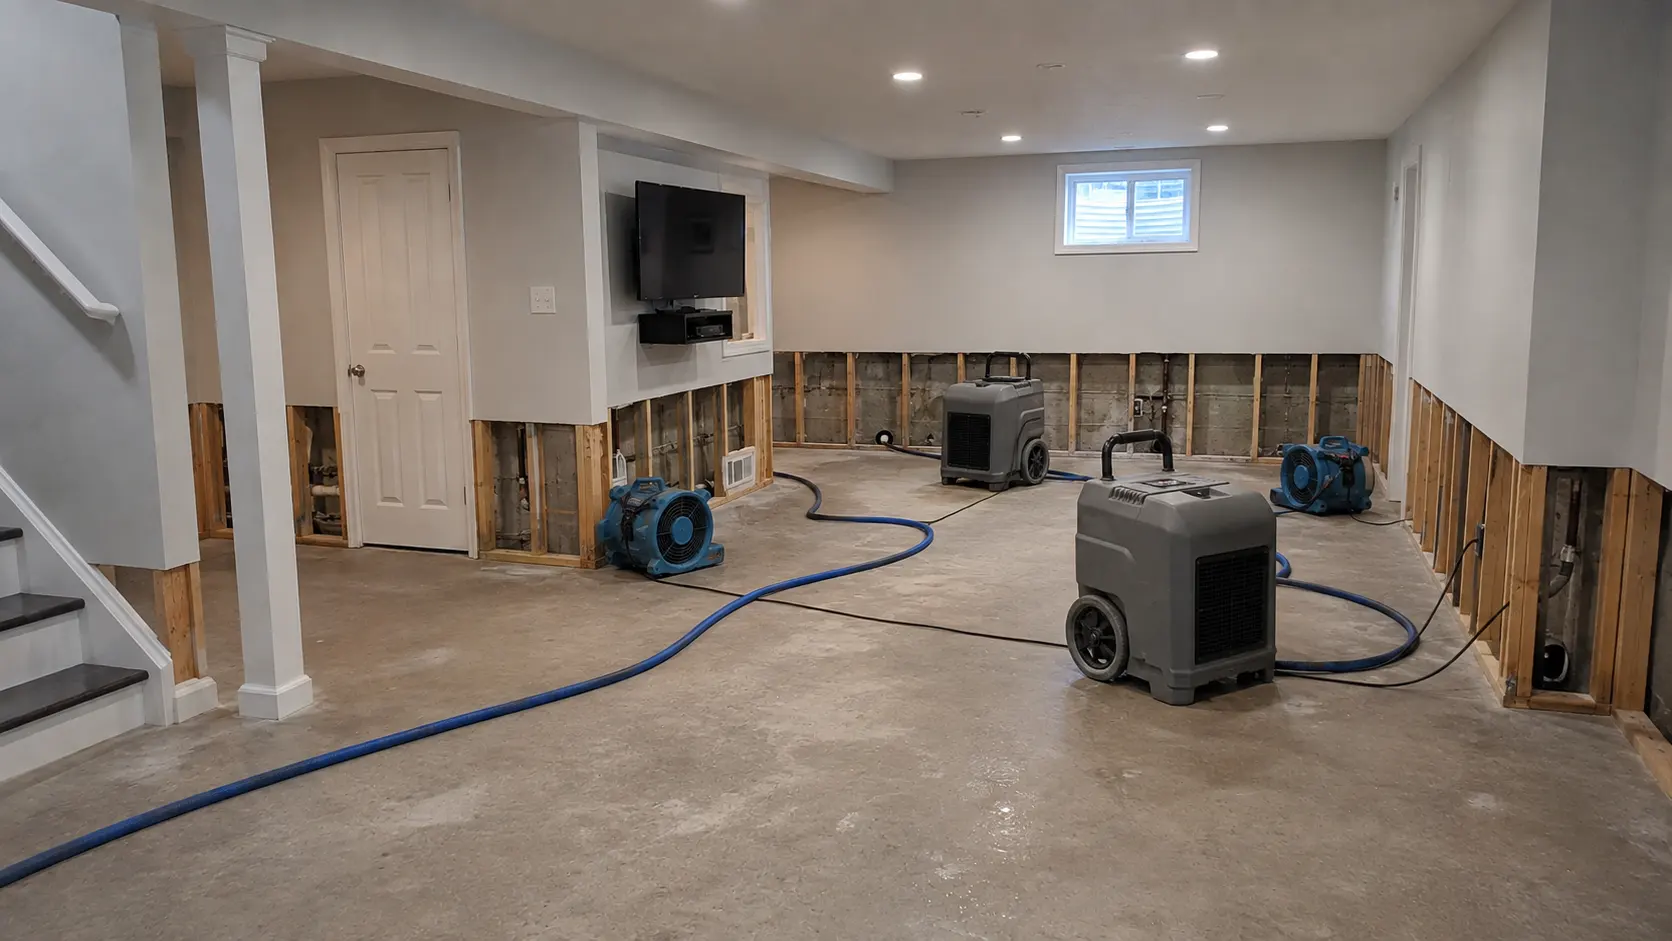
A flood cut is a horizontal section of drywall removed from the bottom portion of a wall after flooding or significant water damage.
In many basement restoration projects, contractors make a flood cut approximately 24 inches above the floor.
This is why homeowners often hear terms such as:
The purpose is not simply to remove ugly or stained drywall. Opening the wall provides access to wet insulation, studs, wall plates, and the back side of remaining drywall so the wall cavity can be properly cleaned and dried to prevent mold growth.
No. Twenty-four inches is a convenient and commonly used height for lower-wall repairs, especially when water damage is confined near the floor. But the correct cut height depends on how high the water and moisture traveled.
Professional guidance generally calls for removing damaged wallboard beyond the affected area. FEMA flood guidance has recommended cutting wet wallboard and fiber insulation at least 12 inches above the high-water line.
For example, if floodwater reached 16 inches up the wall, stopping the cut at exactly 24 inches may not provide enough clearance above damaged material.
The restoration technician will inspect and measure the affected wall to determine the height the drywall needs to be cut at.
After determining the appropriate height, the damaged section of drywall is removed.
Baseboards and trim are normally taken off first.
A level horizontal cut is then made across the wall. Keeping this cut straight can make the later drywall replacement easier.
The lower drywall is carefully removed from the framing while contractors watch for:
Once the drywall is removed, the condition inside the wall can finally be seen.
This often reveals moisture that was not obvious from looking at the painted surface.
Wet insulation is another major concern after a basement flood.
Insulation installed between wall studs can hold a substantial amount of moisture. Even when the visible surface of a wall begins looking dry, insulation behind it may remain saturated.
Wet insulation can keep studs, sill plates, and surrounding materials damp.
For that reason, flood-damaged insulation generally needs to be removed from affected wall cavities. FEMA guidance states that most insulation affected by flooding should be removed and replaced.
After the insulation is removed, technicians can inspect the exposed framing and foundation wall.
With the drywall and insulation gone, a restoration technician can evaluate the parts of the wall that were previously hidden.
The inspection may include:
Moisture meters may be used to compare the affected wood and drywall with known dry materials elsewhere in the building.
This step helps determine whether additional demolition is needed.
Floodwater can leave dirt, sediment, organic material, bacteria, and other contaminants behind.
Before reconstruction, exposed surfaces need to be appropriately cleaned.
Depending on the source and category of water, this may involve cleaning:
If there is any visible mold it will be treated first before fans are used to prevent spreading mold spores.
The exact cleaning procedure depends heavily on the type of flooding.
A clean-water plumbing leak is different from groundwater intrusion or a sewage backup.
Drying is one of the most important stages of the entire process.
Replacing drywall before the framing is dry can trap moisture inside the newly closed wall.
Professional drying equipment may include:
Dehumidifiers remove moisture from the air and help lower the overall humidity inside the basement.
High-volume air movers increase evaporation from damp surfaces.
When outdoor temperature and humidity conditions are appropriate, controlled ventilation may help release moisture from the building.
Professional moisture meters help determine whether framing and remaining building materials have returned to acceptable moisture levels.
Drying will take several days and the duration will depending on:
The materials being dry will determine when reconstruction can begin. Moisture meters are used to monitor the framing and drywall.
This is the point where professional restoration differs from simply patching drywall.
The wall can’t be closed until the affected materials have dried.
Moisture readings can be taken from:
If moisture remains trapped inside the wall and new insulation and drywall are installed over it, problems can develop later.
These may include:
Dry first. Rebuild second.
Part 2: Rebuilding. Insulation through painting
Learn the complete flooded basement cleanup and restoration process, from water removal and structural drying to flood cuts, drywall repair, and repainting.